Wednesday 19 December 2012

Second Film

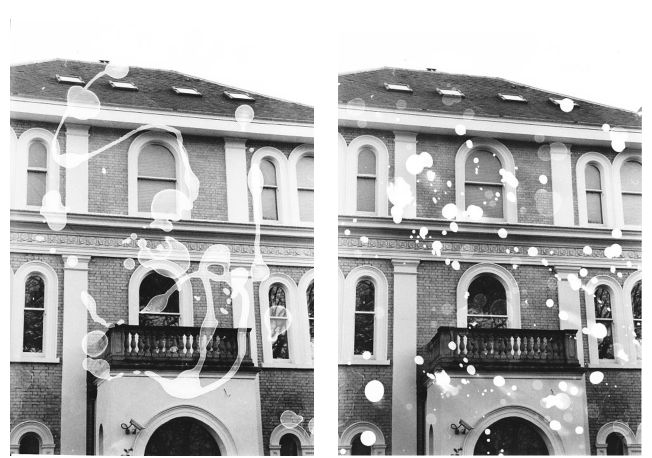
This is the second film I took. I chose Croydon to take photographs of because this is not typically what you think of when you think of Croydon and would not expect it from Croydon. I wanted to show what is beyond the eye and the history that people avoid to notice. All of these buildings are above the shops in Croydon. With their ornate decoration and intricate brick work it makes you appreciate the history of the buildings. Its a shame to know that what they used to be are no longer around and instead they are transformed into a quick place which you cannot appreciate.

I first did a contact sheet to see what each image looks like and to see the contrast of each. I then did a test strip of one image to see what exposure time I needed for the film strip. Some images needed slightly different exposure time that only varied by a couple of seconds. I am pleased with the photographs that I took and they portray what I wished to. My favourite image is of the lace and gloves decoration on the building. Its one of the things you never notice when you're in Croydon and it shows the history of the shop which has completely changed.


Final Film/Outcome Mindmap


Tuesday 18 December 2012

Retro Analog Effect

This tutorial I followed as quite hard to understand because the numbers and settings needed to be changed for each individual picture. For the first image it did not work particularly well and look like the final image it was meant to but I still liked the way it turned out because it changes the look of the image. Retro analog effect works well with singular images with only one main focus point. I chose images which has quite a bit of blue in it as it contrasts with the red and pink of the colour leaks. 


1. Open your photograph in Photoshop.
2. Add a Curves adjustment layer to begin altering the tones of the image. Using an adjustment layer as opposed to the menu command gives you the ability to go back and tweak the settings, or remove them altogether.
3. Change the drop down menu to the Red channel and begin manipulating the curves. Tweak the line into an S shaped bend.
4. Move onto the Green channel, this time increase the green midtones by creating a large flowing bend in the line.
5. In the Blue channel, add both a slight S shaped bend and move the start and end points above and below the original curves line.
6. Fill a new layer with magenta, then change the blending mode to Soft Light. Reduce the opacity of the layer to around 20% to tone down the effect.
7. Press CMD+A to Select All, then go to Edit > Copy Merged (CMD+Shift+A). Paste this duplicate on a new layer, then add a Gaussian Blur. Add a Layer Mask to the blur layer and erase the blurring from the main subjects, leaving spots of blurring creeping in from the edges and in the background.
8. Dab spots of red using a large soft brush on a new layer. Change the blending mode of this layer to Linear Dodge to create a series of light leaks. Reduce the opacity to around 70%.
9. Select All, then right click the document and select Stroke. Add a 100px black stroke to the inside of the canvas.
10. Blur the stroke with maximum settings using the Filter > Blur > Gaussian Blur option to form a vignette. Set this layer to Soft Light at 70%.
11. Dab a large spot of white in the centre of the canvas to highlight the main subjects. Change this to Soft Light at 100%.
12. Fill a new layer with black and add some noise (Filter > Noise > Add Noise). Give the noise layer a slight Gaussian Blur to take the edge off the noise particles, then change the blending mode to Screen at 15%.

Monday 17 December 2012

Handmade Negatives in Photoshop

Using the same tutorial I made for the selective development in Photoshop I created a handmade negative in Photoshop. I like the way it looks but comparing it to a handmade negative that I have made I don't think it looks as technical. With my darkroom handmade negatives I used a range of different materials such as sugar, washing up liquid and food colouring. With my digital handmade negative it looks like I have used only one material such as washing up liquid. 

1. Find a black spray paint splatter on the internet
2. Open the image in Photoshop
3. Open your desired photograph in Photoshop
4. Click on the paint splatter image. 
5. Select - Colour Range - move the fuzziness slider to 200, use the eye dropper to select the black colour in the paint splat, click OK
6. Go back to your photograph - Select > All > Edit > Copy
7. Go back to your image with the spray paint splatter selected, Edit > Paste Special > Paste Into
8. Re-size the image if needed
9. Select the splat layer. Go to Edit > Adjustments > Hue/Saturation. Drag the saturation down and lightness down.


Selective Development in Photoshop

I wanted to experiment with creating selective development in Photoshop. I used my own knowledge of Photoshop to come up with a tutorial on how to create selective development. I was happy with the way that  the images came out as I didn't think that they would look like they have been selectively developed.

1. Find a black spray paint splatter on the internet
2. Open the image in Photoshop
3. Open your desired photograph in Photoshop
4. Click on the paint splatter image. 
5. Select - Colour Range - move the fuzziness slider to 200, use the eye dropper to select the black colour in the paint splat, click OK
6. Go back to your photograph - Select > All > Edit > Copy
7. Go back to your image with the spray paint splatter selected, Edit > Paste Special > Paste Into
8. Re-size the image if needed


Sunday 16 December 2012

Blueprint Tutorial

I followed a YouTube Tutorial to create these blueprint images. I am really pleased with the way they came out as they look like blueprints. The lines could have been a bit thicker on the first image but You can still tell what the image is and it still looks like a blue print. I chose this tutorial as it was the only one I found that linked well to my theme of architecture. I want to experiment further by creating a detailed blueprint in Photoshop and by hand drawing a simpler version then printing photographs of what the building looks like and laying them out neatly combined on a piece of card to make it look like it is the workings and completion of the building being built. 


1. Open an image
2. Make a copy of your image by pressing Ctrl + J
3. Go to filter > Stylize > find edges 
4. Ctrl + shift + U to remove colour
5. Ctrl + L to adjust levels adjust levels to fit with your image 
6. Downlaod and open a paper image 
7. Ctrl + A, Ctrl + C to select all and copy
8. Ctrl + V to paste onto your blueprint image 
9. Crtl + shift + U to remove colour
10. Invert colours by click X
11. Select the brush tool - large sized brush, soft light, 45% brush over the center to lighten it 
12. Drag the layer below your blueprint 
13. To make a Clipping layer press Alt as you hover your mouse between the two layers then click
14. Change blend mode to linear burn on the blueprint
15. create a new layer and make this into a clipping layer
16. Click the black foreground colour and type in 0036A5 and click OK
17. Fill by pressing Alt + Del, change the blend mode to screen 
18. Go to the new layer icon, press Ctrl when you click on it
19. Click the layer mask icon. Click on the empty layer to make it active, call up your rectangular marquee tool, draw a box from one corner to the other slightly smaller than the image, go to edit and Stroke 3PX - black - inside, Ctrl + D to deselect 
20. Click on the layer mask to make it active, go to brush tool and open a 'Grunge' brush or download then import the brush. Decrease the size a bit. Brush over the boarder 
21. Decrease the size of the blueprint to fit inside the box. Click on the blue print layer , Ctrl + T, hold Sift + Alt and re-size the image 
22. Click on the layer mask tool. Click the layer mask to make it active. use the grunge brush tool to go round the edges to rough it up a bit.

Tuesday 4 December 2012

Solarisation

Solarisation is an effect whereby the tones are partially reversed, dark areas appear light and light areas appear dark. I created this effect by choosing an image with high contrast. The first step I did was expose the image for the correct exposure time, in my case it was 12 seconds, I then placed it in the develop until the image started to appear. I then quickly took it over to an enlarger with a aperture of 2.5 and exposed my print to the light for 1 second. I then placed it back into the develop tray until I was happy with the outcome. I then moved it into the stop then into the fix and lastly wash. It was quite hard to judge whether it had worked well in the darkroom, so after I had made the print I took it outside into the light to see if it had worked well. 
Some did not solarise as well as others but I really like the way the photograph of the stairs came out. I think because of the interesting crossing over of the columns the Solarisation makes it seem more interesting and draws attention to the eye. For the second image below I solarised a reversal which made some areas brighter than others, this may be due to shadows or it could be where the chemicals did not react with the photographic paper. 


Experimentation

I experimented with a range of different techniques in the darkroom. The first experiment was with bending the paper to create a distorted image. The first image is the original image.To distort the image I placed four lead weights by the four corners on a piece of photographic paper under the enlarger,I then bent the paper so that it was bent upwards. I refocused the image on the highest point of the paper and exposed the image for 12 seconds on f16 with filter 5.This makes the image bend in the opposite way, inwards. I then experimented with bending it inwards to see what outcome it produced. This made the image concave. Below are all my experiments of this technique. 
I wondered what would happen if I put water onto a piece of paper, whether the image would be distorted. I also drizzled some washing up liquid onto the photographic paper as it is denser than water. In the first image the water is not visible on the paper but the washing up liquid made areas of the photograph lighter. In the second image I dripped the paper with stop and fix. The fix is the lighter splashes and the stop is the darker image. This creates an effect on rain droplets, I think this would work particularly well with a snow scene photograph.
I had experimented with handmade negatives before and really enjoyed it so I wanted to take it a step further by combining hand made negatives and an image. Firstly I did a test strip of my hand made negative so that I knew how long to expose it for. I then took away 4 from 12 and exposed my house image to the photographic paper. Next I placed the paper under a different enlarger with my handmade negative and exposed it for 4 seconds. They came out quite dark in each image I did and was not sure why. I tried exposing the hand made negative first instead of last to see if this made a difference but it didn't.
I wanted to get the hand made negatives and prints to come out well so I experimented again in the darkroom. This time I used food colouring instead of washing up liquid which made it harder for the light to go through. I think this worked better than my previous attempt as you can see more of the image and it also gives it an effect of being destroyed or burnt.

Monday 3 December 2012

First Film

I followed by shooting plan to when I was taking my photographs. I thought of a range of different subject matter before I took the photographs and what experiments I could apply to them. For this film I went out with the intention of experimenting with combination printing and photo montage.


Shooting Plan

I have created this shooting plan so that I know what I need to take photographs of, the lighting, angles and what I might be considering on doing to the photographs such as working into them with thread, paint, bleaching them or applying two or more techniques over the one image.