Showing posts with label Photoshop. Show all posts

Tuesday, 3 July 2012

Animated Gifs

An animated gif is a type of GIF image that can be made to show movement by combining several images into a single GIF. There are two types of animated gifs, one being a combination of several photos and the other being a combination of a video and a still image. 


Jamie Beck is a New York City based fashion photographer. He collaborated with Kevin Burg, a web designer with a background in video and motion graphics, to develop the art of animated GIFs. They began creating them during fashion week a year ago. Their first animated images were a series of still shots in a continuous loop. Then on they began to find new ways of creating a more fluid motion and isolating certain parts of an image to capture the moment. The process involves still and video photography. Taking a photograph captures the moment in a still time frame but with an addition of video it allows that magical moment to come to life. Cinemagraphs are a way of adding motion to a still image. For them a intricate ones would take about a day whereas a simpler one would take 3-4hours. 
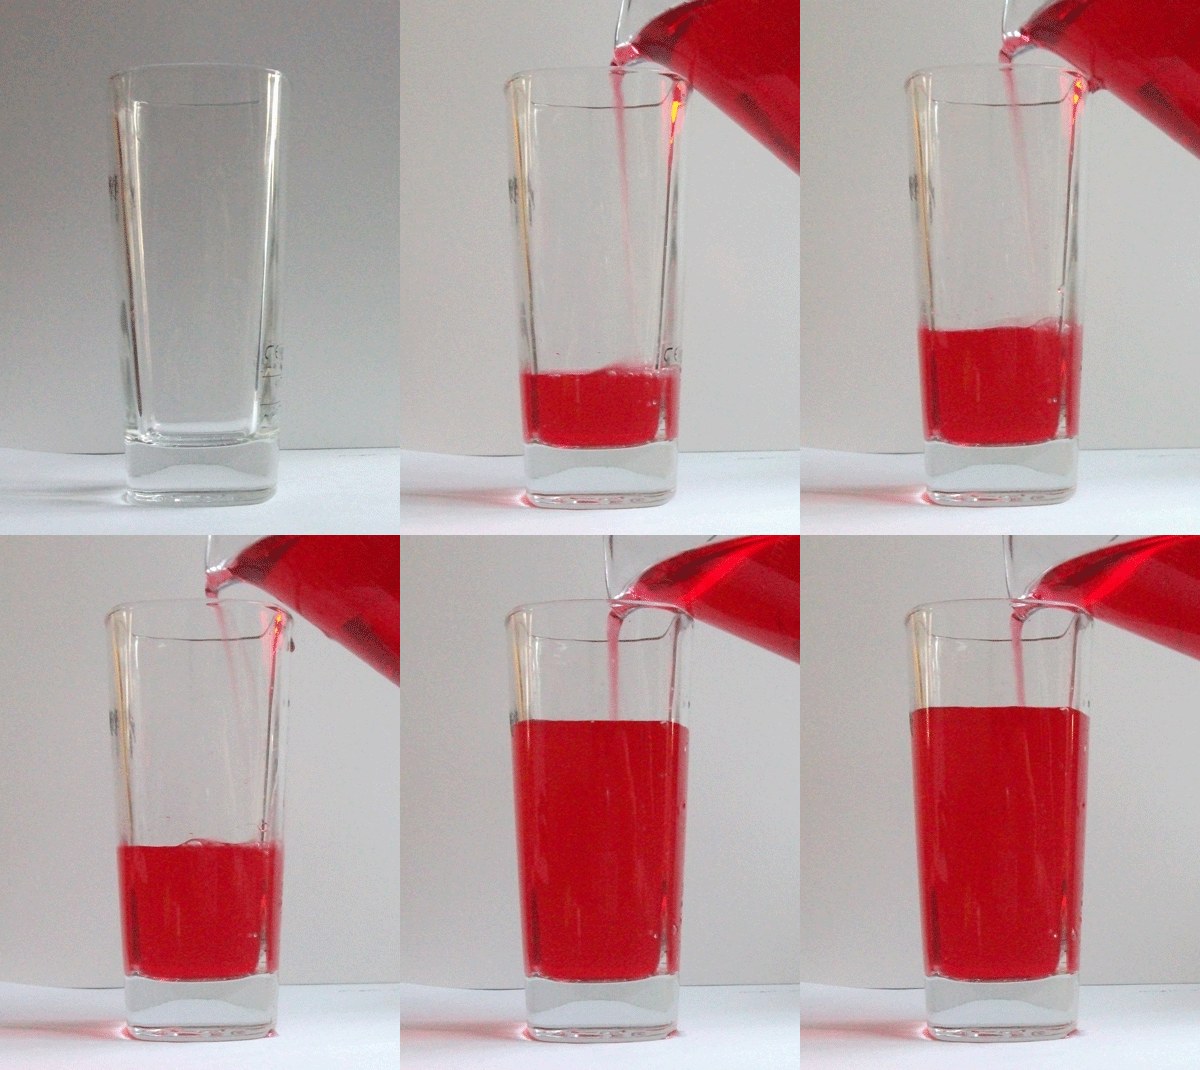
This was my first attempt at creating an animated gif.
1. I set up what I wanted to capture and set my camera up on a tripod.
2. I put my camera on continuous shutter
3. Filled the glass up slowly whilst taking continuous photographs.
4. Open photoshop and load all the images in separate layers. The easy way to do this is  go to file - scripts - load files into stack.
4. Select windows - animation. This will have the first image selected in the box that pops up.
5. Click on the small tab at the bottom of the animation box that says 'duplicate this layer'. To add the second photo click on the eye next to the first image/layer in the layer box.
6. Continue to duplicate the layer and hide the previous layer until you have reached the last photo. Keep the last layer visible.
7. Shift - click all of the boxes so that they are all selected in the animation box.
8. Click on the time selector at the bottom left hand corner of the animation box. Here you can change how much time you want between each photograph.
9. Click on the repetition selector, choose 'forever'. Click the play button to preview the animation. After viewing it you can change the timings between each frame and whether to delete or keep each frame.
10. To save click save for web and devices. Adjust the side, make sure the dither is up to 100% and that the colours are up to the highest. Save as gif. 
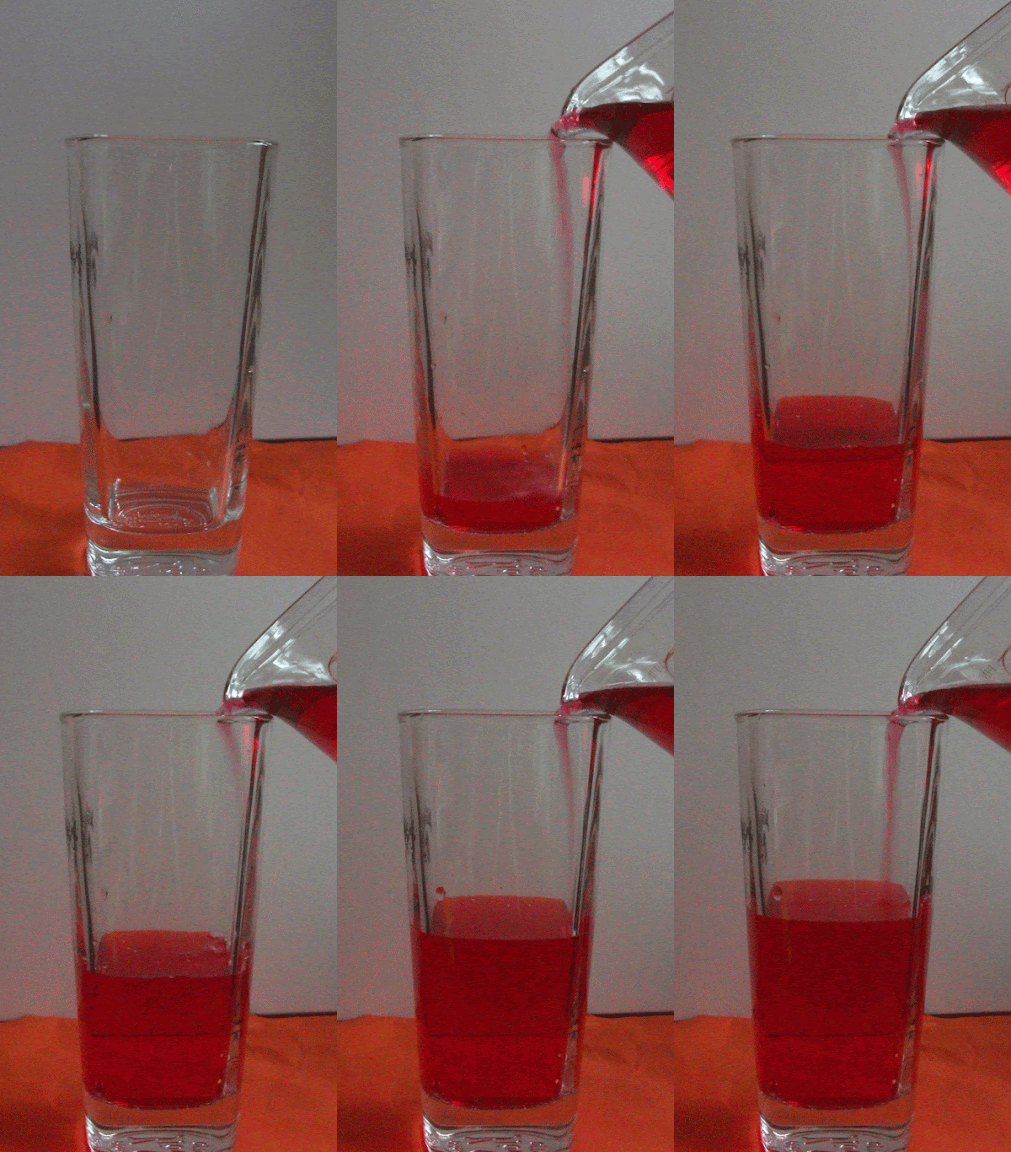
This was my second attempt at an animated gif following the same theme as the one before. I think these worked quite well as my first animated gifs I've made as they were simple but captures what I wanted to without it going wrong. I coloured the water red so that it would be easy to see the water being poured into the glass.  

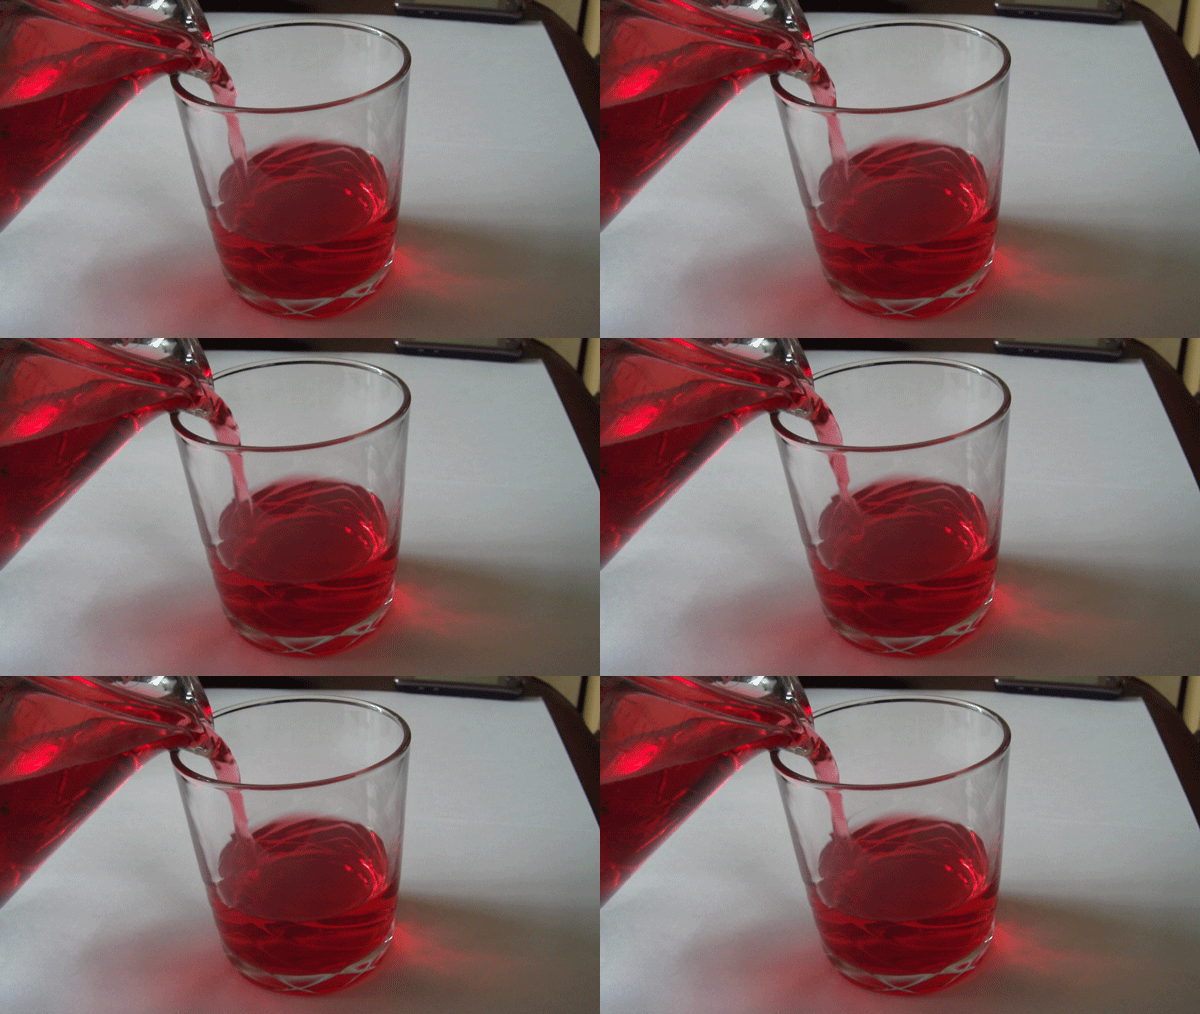
This was slightly different to an animated gif, I wanted to develop my skills further so I tried to make a cinemagraph. I did this in Photoshop by following a tutorial.

1.. capture a video of the set up where something is moving.
2. Open Photoshop. Press ctrl O to open a file, open the video file that you are using for your cinemagraph.
3.  If the animation box does not pop up straight away then go to windows - animation.
4. Click on the fly out menu ( arrow with 3 lines next to it) and click document settings. Change the Frame rate to 15fps.
5. move the first time line indicator to where you want your video to start from. move your mouse to over the Work area start point, click and hold and hold down shift and drag it to the time line indicator that you just moved. The Work area start point should snap to the line.
6. Capture about 12 frames of the video for the animation. move to the bottom of the animation box and select next frame, click this 12 times.
7. Click and hold the work area end point, hold down shift and drag it to where the time line indicator is now at. Press play to view the frames inside of the selected region.
8. Go to the fly out menu, click trim document duration to work area.
9. Use the time line indicator to find a frame that you want to capturre as the still photograph.
10. Go to select - All. Go to Edit - Copy Merged. Go to Edit - Paste.
11. Press the Q key, or go to the icon with the white circle in the square underneath the colour box. Select the paintbrush tool and select the colour black. Choose the size of the brush depending on your image and with a hardness of 68%.
12. On your image, paint over the areas of the image that you do not want to move.
13. Select the Q key or to icon underneath the colour box. This makes a quick selection.
14. In the layers panel, hide the video layer by clicking they eye next to layer 1. Have the frozen layer selected (layer 2.)
15. Hold the Alt key and click the layer mask button at the bottom of they layer panel.
16. Turn on the visibility of the video layer by clicking the eye next to layer 1.
17. In the animation box, click play to view the animation.
18. Go to the fly out menu once again, click flatten frames into layers. Each frame is now in a layer. throw away the original layers, select the layer with the mask (layer 2, and layer 1), drag them to the trash can icon.
19. Select the lowest frame (frame 0). Right at the base of the right hand side of the animation box is an icon with 3 squares in it, click on this.
20. Go to the fly out menu, click make frames from layers. Click the play button to view the series of frames.
21.  On the first frame Click on the time selector at the bottom left hand corner of the animation box and select no delay.
22.  Click on the repetition selector, choose 'forever'. Press play to view the animation.
23. To export it as an animated gif, go to file - save for web and devices.
24. adjust the file size down for example 600w. in the presets select GIF, selective, dither the image with pattern, select the highest colours, click on covert to sRGB. Save.

I found this slightly harder than the animated gif as it had more steps involved but once I had worked out where all the icons were it was quite easy to follow. I think its a easy way to create a cinemagraph with simple steps. I was pleased with my own one as I like how the water level of the liquid does not increase as the water is being poured in. 

Geraldine Georges inspired experimentation

Geraldine Georges is a Belgium illustrator and graphic designer who uses a combination of illustration and photography. Her images consist of most commonly portraits adorned with shapes and objects such as flowers, bold black lines and areas. In some of her illustrations animals are included as either extras or to become part of the form. 
Below is my hand made attempt of creating an image inspired by Geraldine Georges. I used different materials such as ink, pens and paper. I splatted and dotted the ink around the page then tipped it up and blew the ink so that the ink could spread. I cut around a photograph then cut into it, I wasn't paying particular attention to detail except for when cutting around the eye. As I had a limited amount of time to create this it was hard to make it quite creative so it had to be kept simple but still with comparisons to Geraldine Georges work.
 

Photoshop Experiments
This was my first attempt at using Photoshop to create a Geraldine Georges inspired image.
 To create this I followed a Photoshop tutorial.

1. open the desired photograph into Photoshop, and create a new blank A4 document.
2. Drag the photograph onto the blank document. Holding down shift, re-size the photograph so that it is fairly small.
3. Using the lasso tool or the magnetic lasso tool draw around the area of the picture that you want. To select more than one part hold down shift and select another area.
4. Hold ctrl and click the mouse and click select inverse. press delete then deselect.
5. Using the eraser tool eliminate areas of the image that you don't like, also using the magic want tool so that it snaps to specific parts for a cleaner eraser.
6. Create a new layer. Using the shape tool for a circle for example, draw where you want the shape to be. Drag this layer to below the image so that it will appear behind it. fill the shape black.
7. Create a new layer. Click on the brushes icon and experiment with using the different types to see what works well with the image. As it is as a new layer you can delete it and start again without deleting the photograph.
8. Add colour with the different brushes depending on what works well with the photograph. 
This was my first attempt of adding colour. To begin with I didn't want to add colour as I thought it spoils the photograph, but as I added more colour and drip marks I think that colour added another element to the image. (image below).

I liked the hands on approach to creating a Geraldine Georges inspired piece as I could make it how I wanted it without any obstacles such as brushes. Photoshop however can lead to more creative ideas and colours. The brushes available can vary and for specific brushes they can be downloaded. After doing the two I now think that I prefer Photoshop as its more creative with brushes however it is very time consuming and harder to draw accurate shapes with a cursor. I resorted to using software called X-pen, it allows you to freely draw on a pad which is like drawing on paper which appears on screen. 

Lin Osborn style photographs

Looking at Lin Osborn's work I experimented with creating my own Lin Osborn inspired arranged photographs. This is an example of her work.
 
Using photoshop I followed a tutorial to create my own arranged photographs inspired by her. 
1. New document - 210mm x 210mm.
2. Drag all images into photoshop > click crop tool >Hold shift and drag the crop tool to a square > ok
3. Do the same steps for all of the images.
4. Using the move tool drag the images into the blank document.
5.  cmd apostrophe to get a grid up > view > snap to grid
6. Select each image layer > move to the edge of the grid lines > adjust the size
7. Repeat the previous steps for all images.
8.  Hold shift and select all images move so it has an equal boarder.

Below are my own inspired arranged photographs. I chose a selection of photographs of different places but still within my theme of architecture. After arranging the photographs I applied a gradient to the photographs.

Typography

To develop my skills and knowledge of Photoshop further I experimented with a technique called typography. It involves an original image being overlayed and formed by text. I like that you can choose the text you wish to overlay as it can be anything or relate to the text. As well as choosing what text to have you can vary the size of the font, by having the font large you are able to read it and it can tell a story about the image chosen. 
1. Open image > Select > colour range - click Shadows and selection > ok > cmd C to copy > cmd V to paste.
2. Select original layer of image > select > colour range - click midtones and selection > okay > cmd C to copy > cmd V to paste.
3. Select both layers > cmd E > hide original image layer
4. Create a new document for your text 20cm x 20cm resolution 300 > ok
5. Select text tool > draw by holding click and dragging out > open document with text in > copy text > paste into text box in photoshop > font edwardian script font size 30 > deselect
6. Edit > define brush presets > ok
7. Click on image document > select brush tool > new layer > select brush size 300 ensure its black opacity 100 > paste onto photograph covering it all > increase size of brush, paste onto photograph until happy with it. 
8. Click layer mask on text layer > hide layer > select layer 1 > cmd A to select all > cmd C to copy > show text layer > click on the layer mask (white square) > hold alt and click > cmd V to paste your selection > cmd D to deselect.
9. Cmd I to invert > hide layer 1 > create new layer > drag it down so its underneath text layer > fill white.
10. Select text layer > blending options > gradient box - blending mode on screen - choose gradient - edit scale and angle > ok.
11. Select black colour > click on brush tool > soft brush size 30 opacity 30 > paintbrush over certain layers to get rid of excess white

Wednesday, 2 May 2012

Experimentation - Aged Photographs

 I experimented in photoshop to see how I could age some digital photographs that I have taken. I used different layering and blending modes to achieve this look.
Aged Effect:
1: -Open File
- Filter > blur & >surface blur
- Image > adjustments > gradient map (brown > white)
- Image > adjustments > levels (0,0.80,255)
- Image > adjustments > curves ( custom - OP 255, IP 245)
- Image > adjustment > photo filter ( colour - warm yellow, density 30)

2: - Find centre of composition create round selection using elliptical tool
- Select > modify feature selection (80-100)
- Select > inverse
- Filter > blur > lens Blur ( more accurate, Triangle, 10,30,0,0,255,4, uniform, monochromatic)
- Filter > noise > add noise ( 3%, gaussian, monochromatic)

3: Duplicate Background
- Apply grainfilter (12,17, sprinkle)
- Apply overlay blending mode (opacity 50%)
- Add inner glow (screen, 100%,0%, softer edge, 0,250,range 70)
- deselect

4: New layer - scratches
- Multiply blending mode ( opacity 75%, fill till happy with outcome)
- Merge layers

5: new layer - paper texture
- Change blending mode and opacity
Original

Outcome
Original

Outcome
Original

Outcome
Original

Outcome
Original
Outcome

Original
Outcome 


Monday, 19 December 2011

Photoshop Light Paintings

Photoshop Light Paintings 

These are some examples of light paintings created in Photoshop. 
The first stage of making light paintings in Photoshop is by creating a new layer over your selected image and by selecting the paths tool draw over the image in lines and swirls. Select the brush tool and adjust the settings to what effect you want. In the paths window select the paths then click on stoke path. Go to blending options then outer glow and inner and adjust the settings. The Second stage is to create a new layer, select the brush tool and the colour to white. Go to the brush presets, change the size, the spacing, the scattering, and the size jitter. Use the brush tool do draw around some of the previous lines. Using the layer blending options add some outer and inner glow then reduce the opacity of the layer. For stage three, go back to the layers you drew the paths in, click the layer and press delete. A final thing that can make the image look good is by clicking the background image, going to image-adjustments-hue and saturation, select colourize and make the image all one colour.
For more information on how to create light paintings in Photoshop click here.